
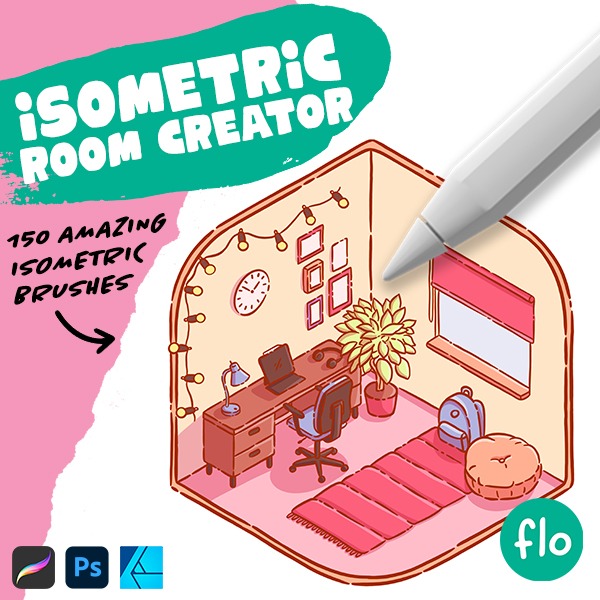
Cute Isometric Room
Get ready to dive into a delightful Procreate tutorial where I’ll introduce you to my latest free isometric brushes! Join the weekly newsletter to snag these gems from my Isometric Room Creator brush pack. With these brushes, you can effortlessly craft charming isometric rooms featuring a plethora of furniture, decorations, and more.
In this tutorial, I’ll guide you on how to utilize these assets to create an adorable Kawaii-style isometric room illustration. Don’t forget to share your masterpiece on Instagram—tag me in the image (not just the description) so I can discover and showcase your work in the next video.
For more Procreate goodness, check out my Patreon, where patrons enjoy exclusive tutorials and additional isometric brushes. Now, grab your iPad, charge it up, and let’s embark on this fun isometric drawing journey!
Brushes used:
- Wardrobe
- Comfy Bed
- Big Plant
- Fluffy Round Pillow
- Script Brush
Canvas Size:
- 2500 x 2500 pixels
Skills Learned:
- Creating an isometric grid
- Using isometric brushes for furniture and decorations
- Positioning elements using the move and transform tool
- Coloring your lineart
- Adding shadows and highlights for depth in the illustration
Get the full set!
Want even more isometric fun? Check out the full brush pack! It contains 150 unique isometric brushes for endless isometric room creation fun.
Kawaii Halloween Stickers
Time for some more Halloween fun! In this tutorial we’ll create these cute sticker style illustrations. You can easily use the color palette and the techniques used to create even more Halloween illustrations that match this little trio. So have fun!
Brushes used:
- Basic Sketcher
- Script Brush
- Monoline Brush
- Soft Brush
Canvas Size:
- 3500 x 3500 pixels
Skills Learned:
- Creating Character Shapes: We’ll start with basic shapes like ovals and circles to form the base of our characters – a pumpkin, a wisp-like creature, and a cat-like bat
- Adding Details & Expressions: You’ll learn how to add cute facial features and small details to bring personality to our characters
- Refined Sketching: Transition from a rough sketch to a more refined one, we’ll focus on cleaner lines and clearer shapes, setting a strong foundation for the inking phase
- Line Art & Color Filling: We’ll practice creating smooth line art with varied weights and filled colors using the line art as a reference layer
- Shading & Highlighting: We’ll add depth and dimension by shading and highlighting, enhancing the stickers’ appeal.
Kawaii Ghost
Brushes used:
- 6B Pencil
- Script Brush
- Monoline Brush
Canvas Size:
- 3500 x 3500 pixels
Skills Learned:
- Basic Sketching: Starting with simple shapes and adding details like a hat, eyes, and mouth to your ghost using the 6B Pencil
- Refining Sketches: Using the liquify tool to adjust shapes and creating a cleaner, more refined sketch over the initial one
- Line Art Techniques: Gaining control over line weight with the Script Brush and using the Monoline Brush for perfect eye shapes
- Coloring and Shading: Learning to use layers effectively for base coloring, adding shadows and highlights to give depth to your character
- Creating Backgrounds and Effects: Adding subtle background details and a sticker effect to your illustration for a polished look
Painterly Cabin
In this tutorial, we embraced a free-flowing, painterly approach, focusing on loose brush strokes and color play. The aim is to let go of perfectionism and enjoy the process of painting. We’ll create this painterly cabin in an autumn forest.
Brushes used:
- Random Strokes Brush
- Dry Mixer Brush
- Smeary Damp Brush
- Opaque Thin Brush
Canvas Size:
- 2300 x 3000 pixels
Skills Learned:
- Layering Colors: You’ll learn how to create depth and interest by layering different colors, using various brushes to achieve a loose, painterly effect
- Brush Control: Adjusting brush opacity and size for different effects taught us greater control and versatility in our painting techniques
- Smudging and Blending: Use the Dry Mixer Brush, we will master the art of smudging and blending colors, creating smooth transitions and dynamic strokes
- Adding Details and Textures: We’ll focus on adding details like tree trunks and leaves, using smaller brush sizes for finer work, and understanding how to balance detail with the painterly style
Pink Forest
Let’s dive right into the heart of this delightful Procreate tutorial where you’re creating a stunning pink forest landscape. The process is smooth and enjoyable, and you’re not using any painterly brushes or gradients. Instead, you’re mastering the art of color variation through a series of shapes and clever use of layer blending modes. Plus, there are two special brushes from the Flotastic Nature Brush Pack for the foliage and grass.
This tutorial is not just about painting a picture; it’s about embracing a whole new approach to color and composition in Procreate.
Brushes used:
- Script Brush
- Scattered Soft Bush
- Rounded Tufts
Canvas Size:
- 2300 x 3000 pixels
Skills Learned:
- Layer Blending Modes: You’re discovering how to use different blending modes for adding depth and vibrancy to your landscape
- Stylized Tree Creation: You’re learning to draw stylized trees, from trunks to crowns, enhancing the forest feel
- Grass and Foliage Techniques: You’re exploring techniques for adding grass and foliage, bringing life and texture to your forest floor
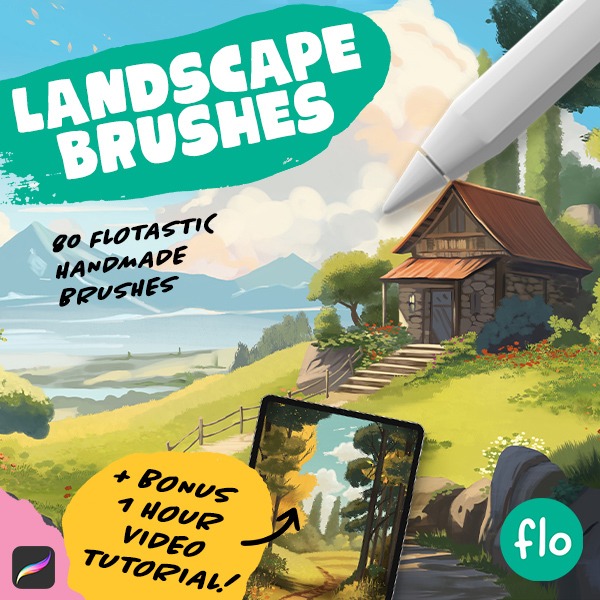
Get the full set!
Want even more landscape painting fun? Check out the full brush pack! It contains 80 unique handmade landscape brushes.

Cat with a Pumpkin
Ready to create something purr-fectly adorable? In this Procreate tutorial, you’ll be drawing a super cute Pumpkin Kitty, a delightful combination of a cat and a pumpkin, perfect for seasonal artwork or just for fun. This project is not only a great practice piece for beginners but also offers useful tips for more experienced artists.
Remember, the magic of digital art lies in experimentation. Don’t hesitate to tweak colors, shapes, or add your own creative flair to your Pumpkin Kitty. And once you’re done, share your artwork! Just don’t forget to tag me so I can find your work, I can’t wait to see it!
Brushes used:
- 6B Pencil
- Soft Brush
- Script Brush
- Monoline Brush
Canvas Size:
- 3500 x 3500 pixels
Skills Learned:
- Using Layers Effectively: Learn to manage multiple layers for sketching, line art, coloring, and shading
- Mastering Alpha Lock and Clipping Masks: These tools are crucial for non-destructive editing and applying effects to specific areas
- Creating and Coloring Line Art: Tips for using pressure sensitivity to vary line weight and using the Monoline Brush for perfect circles
- Applying Shading and Highlights: Techniques for adding depth and dimension to your character using the Soft Brush and blending modes like Multiply and Screen
Art Nouveau Bird
This tutorial is a fantastic opportunity to dive into the world of Art Nouveau and learn how to bring stylized, organic beauty into your digital art creations. Embrace these skills, and you’ll be creating stunning pieces in no time. Keep experimenting and enjoying the process, and don’t hesitate to ask if you have questions. Excited to see what your creations!
Brushes used:
- Basic Sketcher
- Script Brush
- Soft Brush
Canvas Size:
- 3500 x 3500 pixels
Skills Learned:
- Creating Organic, Swirly Shapes: You’re focusing on developing fluid, floral shapes that are characteristic of the Art Nouveau style, making your artwork look elegant and organic
- Refining Sketches: You’re learning to start with a basic sketch and refine it meticulously to prepare for detailed line art, enhancing the overall look of your design
- Utilizing the Liquify Tool: You’re mastering the use of the Liquify tool to adjust elements like the head and tail of the peacock, adding an artistic touch to your creation
- Effective Layer Management: You’re getting skilled at using layers to separate main outlines from detailed lines, which streamlines the coloring process
- Coloring and Gradient Techniques: You’re exploring the use of various colors and gradients to add depth and vibrancy to your artwork, bringing the peacock and background to life with a rich palette
Autumn Sunset
Welcome to your next Procreate project! If you’re new to digital art or just looking to brush up on your skills, this tutorial is perfect for you. We’ll be creating a stunning Autumn landscape together, step by step. It’s a fantastic way to learn, and I can’t wait to see your take on it. Don’t forget to tag me on Instagram with your finished piece!
As you dive into this tutorial, remember that it’s all about learning and enjoying the process of creating art.
Brushes used:
- Monoline Brush (Calligraphy)
- Script Brush (Calligraphy)
- Soft Brush (Airbrushing)
- Styx Brush (Drawing)
- Reed Brush (Organic)
Canvas Size:
- 2300 x 3000 pixels
Skills Learned:
- Layer Management: Learn effective ways to create, merge, and manipulate layers
- Creating Gradients and Textures: Use airbrushing for gradients and the selection tool for adding textures
- Reflections and Lighting: Discover methods to add realism through water reflections and light effects.
Painterly Pond
Dive into the world of digital impressionism with this fun and easy Procreate tutorial! Perfect for Flocreators who want to break free from perfectionism. Let’s create a colorful and expressive painting together!
Brushes used:
- Spectra Brush
- Turpentine Brush
- Acrylic Brush
- Leatherwood Brush
- Oberon Brush
- Water Pen
Canvas Size:
- 2000 x 3000 pixels
Skills Learned:
- Color Manipulation and Contrast: Learn how to use Procreate’s brushes to create a painterly effect and manipulate colors and contrast for an expressive outcome
- Creating Backgrounds and Textures: Discover techniques to create bushy backgrounds and water reflections, using various brushes for texture
- Detailing with Brush Strokes: Master the art of adding details through specific brush strokes, creating elements like trees, bridges, and clouds
- Layer Management: Gain insights into effective layer management for complex compositions, including duplicating layers for reflections