
Painterly Cabin
In this tutorial, we embraced a free-flowing, painterly approach, focusing on loose brush strokes and color play. The aim is to let go of perfectionism and enjoy the process of painting. We’ll create this painterly cabin in an autumn forest.
Brushes used:
- Random Strokes Brush
- Dry Mixer Brush
- Smeary Damp Brush
- Opaque Thin Brush
Canvas Size:
- 2300 x 3000 pixels
Skills Learned:
- Layering Colors: You’ll learn how to create depth and interest by layering different colors, using various brushes to achieve a loose, painterly effect
- Brush Control: Adjusting brush opacity and size for different effects taught us greater control and versatility in our painting techniques
- Smudging and Blending: Use the Dry Mixer Brush, we will master the art of smudging and blending colors, creating smooth transitions and dynamic strokes
- Adding Details and Textures: We’ll focus on adding details like tree trunks and leaves, using smaller brush sizes for finer work, and understanding how to balance detail with the painterly style
Pink Forest
Let’s dive right into the heart of this delightful Procreate tutorial where you’re creating a stunning pink forest landscape. The process is smooth and enjoyable, and you’re not using any painterly brushes or gradients. Instead, you’re mastering the art of color variation through a series of shapes and clever use of layer blending modes. Plus, there are two special brushes from the Flotastic Nature Brush Pack for the foliage and grass.
This tutorial is not just about painting a picture; it’s about embracing a whole new approach to color and composition in Procreate.
Brushes used:
- Script Brush
- Scattered Soft Bush
- Rounded Tufts
Canvas Size:
- 2300 x 3000 pixels
Skills Learned:
- Layer Blending Modes: You’re discovering how to use different blending modes for adding depth and vibrancy to your landscape
- Stylized Tree Creation: You’re learning to draw stylized trees, from trunks to crowns, enhancing the forest feel
- Grass and Foliage Techniques: You’re exploring techniques for adding grass and foliage, bringing life and texture to your forest floor
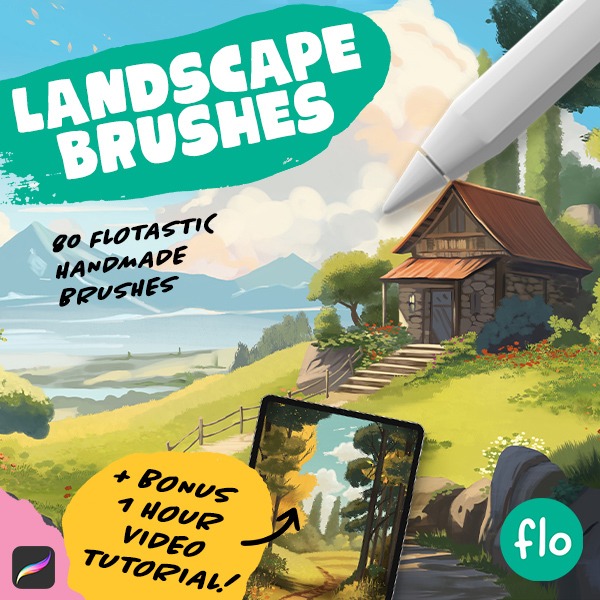
Get the full set!
Want even more landscape painting fun? Check out the full brush pack! It contains 80 unique handmade landscape brushes.

Art Nouveau Bird
This tutorial is a fantastic opportunity to dive into the world of Art Nouveau and learn how to bring stylized, organic beauty into your digital art creations. Embrace these skills, and you’ll be creating stunning pieces in no time. Keep experimenting and enjoying the process, and don’t hesitate to ask if you have questions. Excited to see what your creations!
Brushes used:
- Basic Sketcher
- Script Brush
- Soft Brush
Canvas Size:
- 3500 x 3500 pixels
Skills Learned:
- Creating Organic, Swirly Shapes: You’re focusing on developing fluid, floral shapes that are characteristic of the Art Nouveau style, making your artwork look elegant and organic
- Refining Sketches: You’re learning to start with a basic sketch and refine it meticulously to prepare for detailed line art, enhancing the overall look of your design
- Utilizing the Liquify Tool: You’re mastering the use of the Liquify tool to adjust elements like the head and tail of the peacock, adding an artistic touch to your creation
- Effective Layer Management: You’re getting skilled at using layers to separate main outlines from detailed lines, which streamlines the coloring process
- Coloring and Gradient Techniques: You’re exploring the use of various colors and gradients to add depth and vibrancy to your artwork, bringing the peacock and background to life with a rich palette
Forest with a Girl
In this Procreate tutorial, we’ll create a lovely Autumn scene, I’d say the level is about intermediate. We’ll kick off with setting up a grid to help us plan out our scene, then move on to sketching everything from hills to a central character. It’s a step-by-step guide that’s easy to follow, and by the end, you’ll have a vibrant, Autumn-themed illustration.
Brushes used:
- Basic Sketcher
- Script Brush
- Soft Brush
- Tapered Lines Brush
- Flying Leaves Brush
Canvas Size:
- 2300 x 3000 pixels
Skills Learned:
- Creating and Utilizing a Grid: Learn to set up a grid on your canvas to aid in the placement and proportion of the elements
- Sketching Techniques: Gain insights into sketching out the scene with a focus on creating a loose and dynamic composition that includes elements like trees, paths, and hilly landscapes to add depth
- Flat Color Application: Learn how to lay down flat colors efficiently, layer by layer
- Adding Details and Gradients: The process of adding gradients to create depth and volume in the landscape, as well as detailing techniques for the trees, path, and character
Kawaii Bunny Wizard
Join us in a fun Procreate tutorial where we’ll create a Kawaii Bunny Wizard together. You’ll learn to sketch, color, and add some cute magical touches using easy-to-follow steps. It’s great for any skill level, so grab your iPad and let’s make some art!
Brushes used:
- Basic Sketcher
- Soft Brush
- Script Brush
- Monoline Brush
Canvas Size:
- 3500 x 3500 pixels
Skills Learned:
- Creating Basic Shapes: Starting with simple ovals and lines to form the basic structure of the bunny wizard
- Sketching and Detailing: Adding furry details and accessories like a hat, robe, and staff to the basic shapes
- Line Art Techniques: Using a brush from the Calligraphy set to outline the sketch and create clean lines
- Coloring and Shading: Applying flat colors, then using multiply layers for shadows and screen layers for highlights
- Adding Special Effects: Incorporating sparkles, stars, and magic effects to give life and magic to the illustration
Realistic Egg
In this easy and fun tutorial I will guide you through the steps of creating this realistic looking cracked egg. And I promise you, it’s easy! After following this Procreate tutorial you will have a result that you’ll be proud of.
Brushes used:
- Monoline Brush
- Soft Brush
- Dry Fine Liner Brush
- Light Shader
- Dark Shader
- Dibby Dabby Brush
- Spackle It Brush
Canvas Size:
- 2300 x 3000 pixels
Skills Learned:
- Creating Basic Shapes: Learn to draw and adjust basic shapes like ovals for the egg using the Monoline Brush and liquify tool
- Layering and Masking: Discover the use of layer duplication, masking, and selection tools for creating and controlling cracks in the eggshell
- Shading and Texturing: Master the art of adding shadows, highlights, and textures to give your egg realism. This includes using different brushes and layer blending modes like multiply
Waterfall in Paradise
In this tutorial we’ll create a stunning waterfall scene! We’ll use a variety of brushes to make our scene come to life, so I’ve made a special little brush pack for you with all the brushes we’ll be using. This tutorial is a bit more challenging, but I’ll be guiding you through all the steps. You can do it!
Brushes used:
- Flotastic Brush
- Soft Scattery Bush Brush
- Shader Brush
- Big Watery Blotcher
- Glitter Streak Brush
- Blobby Foliage Brush
- Multiply Brush
- Lighten Line Brush
- Soft Rounded Mossy Grass Brush
- Rounded Rough Brush
- Flotastic Inker
Canvas Size:
- 3500 x 3500 pixels
Skills Learned:
- Layering Techniques: Understanding how to effectively layer different elements like grass, water, rocks, and trees to create depth
- Color Blending: Techniques for blending colors smoothly, especially for elements like clouds, water, and rocks
- Creating Natural Textures: Using various brushes to mimic natural textures such as foliage, rocks, and water reflections
- Composition and Lighting: Learning to use light and shadow effectively to create a focal point and enhance the depth of the landscape
Pixel Art Landscape
Ready to dive into the world of pixel art? This simple tutorial guides you through creating a lovely pixel art landscape on a 300×200 canvas. You’ll learn techniques like setting up a drawing guide, drawing mountains and hills, and using layers for depth. We’ll use just one brush, the Pixel Brush, for the entire project. By the end, you’ll have a simple but lovely pixel art landscape!
Brushes used:
- Pixel Brush
Canvas Size:
- 300 x 200 pixels
Skills Learned:
- Using Drawing Guides: Master the art of setting up a grid for pixel-perfect accuracy
- Mountain and Hill Creation: Learn how to shape and color mountains and hills
- Shadow and Light Effects: Add dimension with strategically placed shadows and highlights
- Finalizing and Exporting: Resize your artwork for the best display without losing the charm of pixel art
Isometric Garden
In this tutorial we’ll create this peaceful garden with rounded shapes together. You’ll learn how to use an isometric grid to create this cute design, it’ll be fun!
Brushes used:
- Basic Sketcher
- Script Brush
- Mercury Brush
- Soft Brush
- Light Pen
Canvas Size:
- 3500 x 3500 pixels
Skills Learned:
- Creating an Isometric Grid: Learn how to set up an isometric grid in Procreate for accurate angles and dimensions, essential for isometric drawings
- Sketching and Line Art: Master the art of sketching out your garden design and refining it into clean line art, using the isometric grid as a guide
- Layering and Color Application: Understand how to efficiently use layers for different elements like grass, water, rocks, and structures, and apply colors effectively
- Final Touches with Line Art: Enhance the final piece with subtle line art, adding crispness and definition to various elements