Top Down Room View – Part 2
Now that our line art is done, it’s time to bring our room to life with color, patterns, and lighting. We’ll start by laying down flat colors, adding shadows, and then transforming our scene into both a day and night version using Procreate’s blending modes and effects.
Brushes used:
- Basic Sketcher
- Studio Pen
- Soft Brush
- Medium Brush
- Flower Pattern Brushes
- Stippel Brush
- Tiny Patchy Brush
- Signs Brush
Canvas Size:
- 4500 x 2500 pixels
Key Skills Learned:
- Adding Flat Colors Efficiently: Use separate layers for different elements, drag-and-drop colors, and apply the selection tool with color fill to speed up the coloring process.
- Applying Patterns for Texture: Use clipping masks with pattern brushes like stipple and patchy textures to add subtle detail to rugs, walls, and beddings.
- Creating Realistic Shadows: Multiply layers help cast soft shadows from objects, giving depth and dimension to the scene. A soft brush and selection tool refine shadow placement.
- Adding Light Rays for a Day Scene: Use Add blending mode with a soft brush to paint in sunlight streaming through the windows. Gaussian blur and layer masks help control the intensity and realism.
- Crafting a Night Scene with Glow Effects: Use Bloom and Soft Light blending modes to make lamps glow, adding warmth and contrast. Adjust shadows for a darker ambiance while keeping key highlights.
Isometric Colorful Room
You can draw this in Procreate! In this easy step-by-step tutorial, I’ll show you how to create a colorful isometric room illustration from start to finish. It’s a great way to get familiar with isometric perspective while designing a fun, cozy space. So, grab your iPad and Apple Pencil and let’s get started!
Brushes used:
- 6B Pencil
- Studio Pen
Canvas Size:
- 3500 x 3500 pixels
Skills Learned:
- Using the Isometric Grid: Learn to use the isometric drawing guide and adjust grid settings for precise perspective.
- Sketching Basic Shapes: Break down furniture and objects into simple geometric forms aligned with the grid.
- Creating Clean Line Art: Use inking brushes to refine shapes, incorporating playful, rounded edges for a stylized look.
- Applying Color Efficiently: Use reference layers and drag-and-drop fills to quickly color different elements.
- Adding Shadows for Depth: Use clipping masks and multiply layers to create soft, directional shadows for realism.
Top Down Room View – Part 1
Alright, let’s get into this fun two-part tutorial where we create a cozy top-down bedroom scene in Procreate! In this first part, we focus on sketching and line art using a perspective grid. If you want, you can grab my premade grid and brush pack to make things easier. We build the entire room layout, adding furniture, books, rugs, and even small decor elements like an alarm clock and slippers. Once the rough sketch is complete, we refine it into clean line art, ready for coloring in part two!
Brushes used:
- Basic Sketcher
- Studio Pen
Canvas Size:
- 4500 x 2500 pixels
Key Skills Learned:
- Setting up a perspective grid: Placing vanishing points at the top and bottom for a top-down view and adjusting grid settings for accurate proportions.
- Sketching room elements with perspective: Using a guided perspective grid to build furniture, bookshelves, and decor with proper alignment.
- Adding organic shapes to the scene: Switching off drawing assist to freehand sketch pillows, blankets, plants, and rugs for a natural look.
- Adding depth and texture to objects: Using broken lines for wood texture, subtle curves for fabric, and extra details like shadowed edges to enhance realism.
Cozy Room
I’ve always wanted to make an interior illustration like this, with loose brush strokes and an expressive feel. In this tutorial I’ll show you how you can easily do that with a photo as a base. I think it’s a lot of fun to do! So I hope you’ll enjoy it as much as I did.
Brushes used:
- Basic Sketcher
- Studio Pen
- Monoliner
- Flotastic brush
- Soft Brush (Airbrushing set)
- Smudging Chalk Mixer
- Darken Line Brush
- Lighten Line Brush
- Light Pen
Canvas Size:
- 3500 x 3500 pixels
Skills Learned:
- Setting up perspective grid and drawing guides: Align the drawing guide with the scene’s perspective, creating a vanishing point and horizon line that simplifies and stylizes the layout of objects
- Creating line art and simplifying details: Trace essential shapes using perspective lines, emphasizing clean, bold lines to achieve a stylized look. Organic shapes are drawn on a separate layer to add expressive touches
- Enhancing depth with multiply and screen layers: Multiply layers add shadows, while screen layers provide highlights, creating color variation and realistic lighting effects in the illustration
- Final lighting and shadow adjustments with masks and duplicates: Use layer masks on multiply and screen layers to add depth, emphasize sunlight, and achieve a glowing effect around light sources, giving the final piece a dynamic, sunny ambiance
Isometric Art Room
Isometric drawing tutorials are super popular, and after so many requests, I’m excited to bring you this cozy art room tutorial! We’ll go step-by-step, starting from setting up the isometric grid to adding personalized details like windows, plants, and even a desk. By the end, you’ll have your very own art room scene.
Brushes used:
- 6B Pencil
- Dry Ink
- Studio Pen
- Wet Sponge
- Mad Splashes
- Snow Gum
- Soft Scattery
- Easel
Canvas Size:
- 3500 x 3500 pixels
Skills Learned:
- Setting up an isometric grid: Learn how to set up your isometric grid for easy isometric drawing
- Building the room’s structure: Create the base and volume for your isometric room by following the grid with precision, forming walls and objects like windows
- Creating clean line art and details: Refine the sketch using the Dry Ink brush for crisp lines and add essential room elements like desks, canvases, and plants
- Adding shadows and depth: Use multiply layers and clipping masks to cast convincing shadows and add depth to your room’s objects
- Drawing Sun Rays: Learn how to create lovely soft sun rays shining in your isometric room
Isometric Book House
Let’s create a lovely isometric book house illustration! In this tutorial, you’ll master various features of Procreate while creating a whimsical book-themed house. I’ll guide you through essential techniques, such as using the isometric grid for precision and the alpha lock feature for coloring. Along the way, you’ll also discover how to create depth with layer clipping masks and lighting effects with the bloom feature. It’ll be so much fun!
Brushes used:
- HB Pencil
- Studio Pen
- Medium Nozzle
- Soft Brush
- Light Pen
Canvas Size:
- 2500 x 2500 pixels
Skills Learned:
- Utilizing Alpha Lock and Layer Masks: Learn how to efficiently use alpha lock for coloring within specific areas without affecting other parts, and how layer clipping masks help in adding effects that only apply to certain sections of your illustration
- Mastering the Isometric Grid: Discover how to activate and customize the isometric grid for precise drawing, ensuring your lines follow the exact angles needed for isometric designs
- Creating Lighting Effects with Bloom: Gain expertise in using Procreate’s bloom feature to add realistic lighting effects that enhance your illustration, giving it a magical and dreamy atmosphere
- Adjusting Layer Blending Modes: Understand how different layer blending modes, like “add,” can be used to intensify lighting effects and bring dynamic contrast to your artwork
- Designing with Freehand and Assisted Drawing: Balance between hand-drawn lines for a unique touch and assisted lines for precision, adding character and accuracy to your artwork
Isometric Balcony
I’m thrilled to hear you’re enjoying the isometric tutorials. This time we’ll create a lovely isometric balcony scene. We’re diving into a new style using a square canvas of 3500 x 3500 pixels. We’ll be creating shapes of color without clean line art, using our sketch to build up the forms and adding final touches later.
Brushes used:
- Basic Sketcher
- Studio Pen
- Soft Brush
- Medium Brush
- Tinder Box
- Foliage Brush
- Soft Scattered Leaves
- Isometric Chair brush
Canvas Size:
- 3500 x 3500 pixels
Skills Learned:
- Setting up and using an isometric grid: Learn to configure and use the isometric grid in Procreate for precise drawing and accurate perspective
- Utilizing layers and masks effectively: Master the use of layers, clipping masks, and alpha lock to keep your artwork organized and clean
- Adding textures and details: Enhance your illustrations with various brushes to add textures, patterns, and intricate details
Christmas Isometric
Embrace the holiday season with this tutorial and create a vibrant, festive isometric room in Procreate.
This tutorial guides you through each step of constructing an isometric room, starting from setting up the room structure to adding festive elements like a fireplace, window, couch, rug, Christmas tree, wreath, socks, presents, and a candle. You’ll learn to use various brushes from the Isometric Christmas Pack, perfect your line art, and apply colors with precision. Additionally, the tutorial covers advanced techniques like shading and adding lighting effects to bring your digital art to life.
Don’t forget to share your beautiful artwork and happy creating!
Brushes used:
- Room Brush
- Fireplace Brush
- Window with Curtains Brush
- Couch Brush
- Rectangular Rug Brush
- Decorated Tree Brush
- Wreath Brush
- Sock Brush
- Present Box Brush
- Candle Brush
- Script Brush
- Dry Ink Brush
Canvas Size:
- 2500 x 2500 pixels
Skills Learned:
- Isometric Design: Learn to create a cozy, Christmas-themed room in an isometric perspective
- Layer Management: Understand the importance of creating new layers for each element for easier manipulation and adjustments
- Brush and Tool Techniques: Master the use of isometric brushes, the move and transform tool, and flipping objects for composition
- Line Art and Cleanup: Gain skills in creating clean line art and erasing unnecessary lines for a neater appearance
- Coloring and Shading: Explore techniques for coloring, including using the selection tool for precise areas, and adding shadows to enhance dimensionality
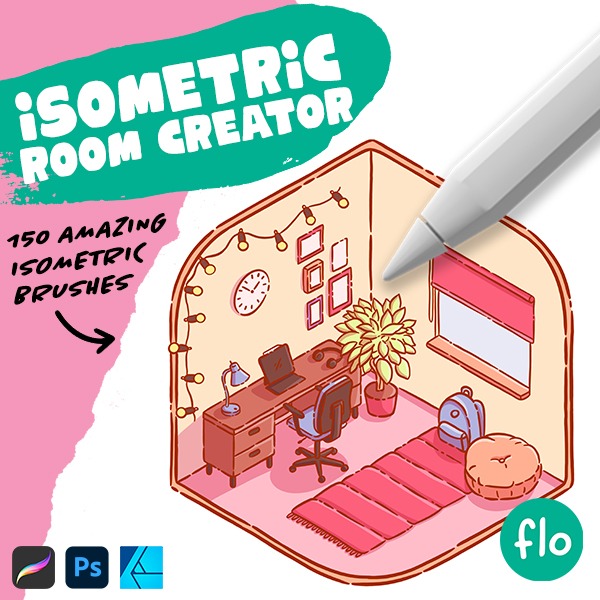
Cute Isometric Room
Get ready to dive into a delightful Procreate tutorial where I’ll introduce you to my latest free isometric brushes! Join the weekly newsletter to snag these gems from my Isometric Room Creator brush pack. With these brushes, you can effortlessly craft charming isometric rooms featuring a plethora of furniture, decorations, and more.
In this tutorial, I’ll guide you on how to utilize these assets to create an adorable Kawaii-style isometric room illustration. Don’t forget to share your masterpiece on Instagram—tag me in the image (not just the description) so I can discover and showcase your work in the next video.
For more Procreate goodness, check out my Patreon, where patrons enjoy exclusive tutorials and additional isometric brushes. Now, grab your iPad, charge it up, and let’s embark on this fun isometric drawing journey!
Brushes used:
- Wardrobe
- Comfy Bed
- Big Plant
- Fluffy Round Pillow
- Script Brush
Canvas Size:
- 2500 x 2500 pixels
Skills Learned:
- Creating an isometric grid
- Using isometric brushes for furniture and decorations
- Positioning elements using the move and transform tool
- Coloring your lineart
- Adding shadows and highlights for depth in the illustration
Get the full set!
Want even more isometric fun? Check out the full brush pack! It contains 150 unique isometric brushes for endless isometric room creation fun.