
Christmas Bear Illustration
Ready to create something adorable for the festive season? In this Procreate tutorial, you’re going to learn how to draw a super cute Christmas Bear. We’ll be using some basic Procreate features like Alpha Lock and having a blast with the Symmetry tool. By the end, you’ll have your own delightful little bear to show off. And hey, if you post it on Instagram, tag me so I can see your fantastic work!
Feel free to experiment with colors and add your own personal touch. Share your creation and inspire others! Remember, Procreate is a playground for your creativity, so have fun and explore different techniques.
Brushes used:
- Monoline Brush (Calligraphy)
- Script Brush (Calligraphy)
Canvas Size:
- 2500 x 2500 pixels
Skills Learned:
- Using the Liquify Tool: You’ll learn how to use these features to sculpt and refine the shape of the bear’s head and body
- Layer Management: Discover how to effectively use layers for different parts of the drawing
- Working with Symmetry and Selection Tools: Explore how to create symmetrical elements like a Christmas tree and snowflakes, and use the Selection tool for precise shapes
Cozy Snow Globe
Get ready to dive into a cozy and creative journey with this easy Procreate drawing tutorial! You’ll be crafting a cozy snow globe scene, full of winter magic. This tutorial is an excellent opportunity to learn by doing, enhancing your skills with Procreate’s selection tool, alpha lock, clipping masks, and layer masks. No prior experience is needed, so let’s jump in!
Brushes used:
- Monoline Brush
- Soft Brush
- Script Brush
- Brush Pen
Canvas Size:
- 2500 x 2500 pixels
Skills Learned:
- Creating Perfect Shapes: Learn to draw perfect circles and ovals using the Monoline Brush and the Quick Shape Tool
- Layer Manipulation: Master the art of duplicating, transforming, and organizing layers for complex shapes
- Alpha Lock and Clipping Masks: Explore the power of alpha lock and clipping masks for detailed coloring and shading
- Symmetry Tool Use: Utilize the Symmetry tool to create balanced designs with ease
- Adding Textures and Highlights: Enhance your artwork with subtle textures and highlights using various brushes
Happy Sun
Get ready to brighten your digital art skills with this super fun and easy Procreate tutorial. Whether you’re a seasoned artist or just starting, this guide will help you create a delightful Happy Sun illustration. And guess what? There’s a follow-up video that teaches you how to animate it in Procreate Dreams! But let’s focus on the illustration part first!
You’ll start by setting up your canvas and drawing a central sun with symmetrical rays. Next, we’ll add textures and gradients to give life to your sun. Then, we’ll use a variety of brushes to detail the sun’s face and surrounding elements like clouds and plants. Finally, if you’re planning to animate your illustration in Procreate Dreams, you’ll learn how to prepare your files for importing into Procreate Dreams by exporting each layer as a PNG.
Remember, this tutorial is perfect for all skill levels. You don’t need any experience with drawing or Procreate to follow along. Be sure to share your radiant results, especially on Instagram (don’t forget to tag me!). Ready to infuse some sunshine into your digital art? Let’s light up your creativity with this Happy Sun illustration!
Brushes used:
- Monoline (Calligraphy)
- Carbon Stick (Charcoal)
- Script (Calligraphy)
- Copperhead (Drawing)
- Dry Ink (Inking)
- Soft Brush (Airbrushing)
Canvas Size:
- 2500 x 2500 pixels
Skills Learned:
- Creating Basic Shapes: Learn to draw perfect circles using the Quick Shape tool for the sun and its rays.
- Symmetry and Transformation: Use the symmetry tool for even sunrays and learn to transform and duplicate layers for consistent design elements
- Texture and Gradient Techniques: Add depth and interest to your sun and rays using various brushes and colors
- Layer Management: Master layer merging, alpha lock, and drawing assist to create complex illustrations with ease
Otherworldly Sunset
Get ready to create a gorgeous looking sunset landscape in Procreate. I’ll guide you through all the steps so you don’t need any experience!
Brushes used:
- Script Brush
- Monoline Brush
- Soft Brush
- Light Brush
Canvas Size:
- 2300 x 3000 pixels
Skills Learned:
- Layering Techniques: Learn to create and manage multiple layers for different landscape elements
- Brush Opacity and Size Adjustments: Understand how to adjust brush settings for different effects
- Gradient Creation: Discover how to blend colors seamlessly for a beautiful sky gradient
- Stylized Texturing: Experiment with wiggly lines and shapes to add texture to trees and hills
Pen and Ink Wolf Landscape
In this straightforward Procreate tutorial, we’ll craft a sleek pen and ink-style masterpiece. Join me as we use an easy brush to create a wolf head silhouette with a charming landscape inside. Learn the ropes of using Procreate stamp brushes and get familiar with sketching. You will learn texturing techniques, navigate the selection tool, and learn how to add a photo texture to your illustration.
The beauty of this tutorial? The acquired skills and style can kickstart a wide range of pen and ink illustrations. Ready to amplify your Procreate game? Let’s get started!
Brushes used:
- Wolf Head Stamp
- Fineliner
- Stipple 2.0
Canvas Size:
- 2300 x 3000 pixels
Skills Learned:
- Working with the selection tool
- Understanding alpha lock
- Adding photo texture to your art
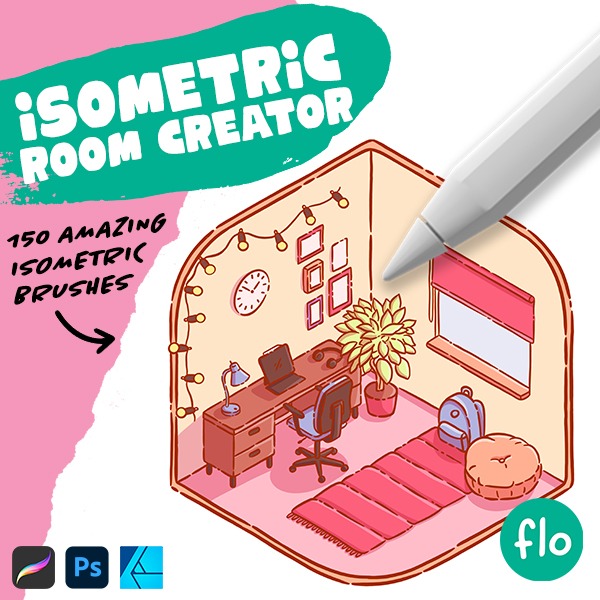
Cute Isometric Room
Get ready to dive into a delightful Procreate tutorial where I’ll introduce you to my latest free isometric brushes! Join the weekly newsletter to snag these gems from my Isometric Room Creator brush pack. With these brushes, you can effortlessly craft charming isometric rooms featuring a plethora of furniture, decorations, and more.
In this tutorial, I’ll guide you on how to utilize these assets to create an adorable Kawaii-style isometric room illustration. Don’t forget to share your masterpiece on Instagram—tag me in the image (not just the description) so I can discover and showcase your work in the next video.
For more Procreate goodness, check out my Patreon, where patrons enjoy exclusive tutorials and additional isometric brushes. Now, grab your iPad, charge it up, and let’s embark on this fun isometric drawing journey!
Brushes used:
- Wardrobe
- Comfy Bed
- Big Plant
- Fluffy Round Pillow
- Script Brush
Canvas Size:
- 2500 x 2500 pixels
Skills Learned:
- Creating an isometric grid
- Using isometric brushes for furniture and decorations
- Positioning elements using the move and transform tool
- Coloring your lineart
- Adding shadows and highlights for depth in the illustration
Get the full set!
Want even more isometric fun? Check out the full brush pack! It contains 150 unique isometric brushes for endless isometric room creation fun.
Fall Landscape with a Boy
In this fun Procreate tutorial, we’ll be creating this vivid autumn landscape complete with trees, reflections, and a cute boy character. Join me in creating realistic foliage, dynamic reflections in water, and a stylized character using various brushes and a warm color palette. The tutorial covers everything from background setup to foreground elements. And no worries! You don’t need any experience with Procreate, I will guide you through every single step.
Brushes used:
- Fineliner
- Round Chalk
- 6B Pencil
Canvas Size:
- 2300 x 3000 pixels
Skills Learned:
- Tree and foliage creation
- Reflections in water
- Character sketching and coloring
- Shadow and highlight application
Haunted House
Are you ready to dive into a spooky, fun Procreate journey? This tutorial will guide you through creating a whimsical, Halloween-themed haunted house. We’re embracing imperfection and wonkiness here, which adds to the charm and creepiness of our haunted house.
This tutorial is not just about building a haunted house in Procreate, it’s about letting your creativity run wild within a structured framework. Whether you’re a beginner or looking to level up your Procreate skills, this tutorial has something for everyone. And remember, sharing your artwork isn’t just about showing off your skills, it’s about inspiring and getting inspired by the community. So, don’t hesitate to flaunt your haunted creation and tag the tutorial creator if you’re posting on Instagram!
Ready to create your very own digital haunted house masterpiece? Grab your iPad, get your Apple Pencil charged, and let the Procreate magic begin!
Brushes used:
- Monoline Brush (Calligraphy)
- 6B Pencil (Sketching)
- Script Brush (Calligraphy)
- Soft Brush (Airbrushing)
Canvas Size:
- 3000 x 2000 pixels
Skills Learned:
- Using Perspective Grid: Learn to create depth and dimension while still keeping that fun wonky look.
- Layer Management: Understand how to effectively use layers, alpha lock, and clipping masks for an organized workflow.
- Creating Textures and Patterns: Develop skills in adding textures to different elements like bricks, wood, and roof tiles.
- Color Blending and Shading: Master the art of subtle shading and blending to give your haunted house a dynamic look.
- Environmental Detailing: Enhance your scene with environmental elements like trees, grass, rocks, and a moon to set the spooky mood.
Kawaii Ghost
Brushes used:
- 6B Pencil
- Script Brush
- Monoline Brush
Canvas Size:
- 3500 x 3500 pixels
Skills Learned:
- Basic Sketching: Starting with simple shapes and adding details like a hat, eyes, and mouth to your ghost using the 6B Pencil
- Refining Sketches: Using the liquify tool to adjust shapes and creating a cleaner, more refined sketch over the initial one
- Line Art Techniques: Gaining control over line weight with the Script Brush and using the Monoline Brush for perfect eye shapes
- Coloring and Shading: Learning to use layers effectively for base coloring, adding shadows and highlights to give depth to your character
- Creating Backgrounds and Effects: Adding subtle background details and a sticker effect to your illustration for a polished look